



大模型部署
关于为什么使用llama3
1是因为llama3是开源模型
2.是因为llama3参数量大,最高支持405b。
Demo:
通过ollama进行下载模型本地启动
ollama类似于python的anaconda pip,可以自动下载并运行大模型文件。
服务器使用p40显卡,显存24G。服务器部署模型为llama3:8b
ollama运行命令
ollama run llama3:8b默认端口 http://localhost:11434/v1
如果想在原有模型的基础上使用扩展功能例如function-calling功能可以通过OpenAI接口的方式进行调用
具体可以使用function calling集成外部工具比如发送邮件或者联网搜索等等,具体可以通过关键词进行触发。在进行本地检索时也可以通过sentence_transformer做向量化
本地demo搭建使用all-minilm-l6-v2进行句子向量化
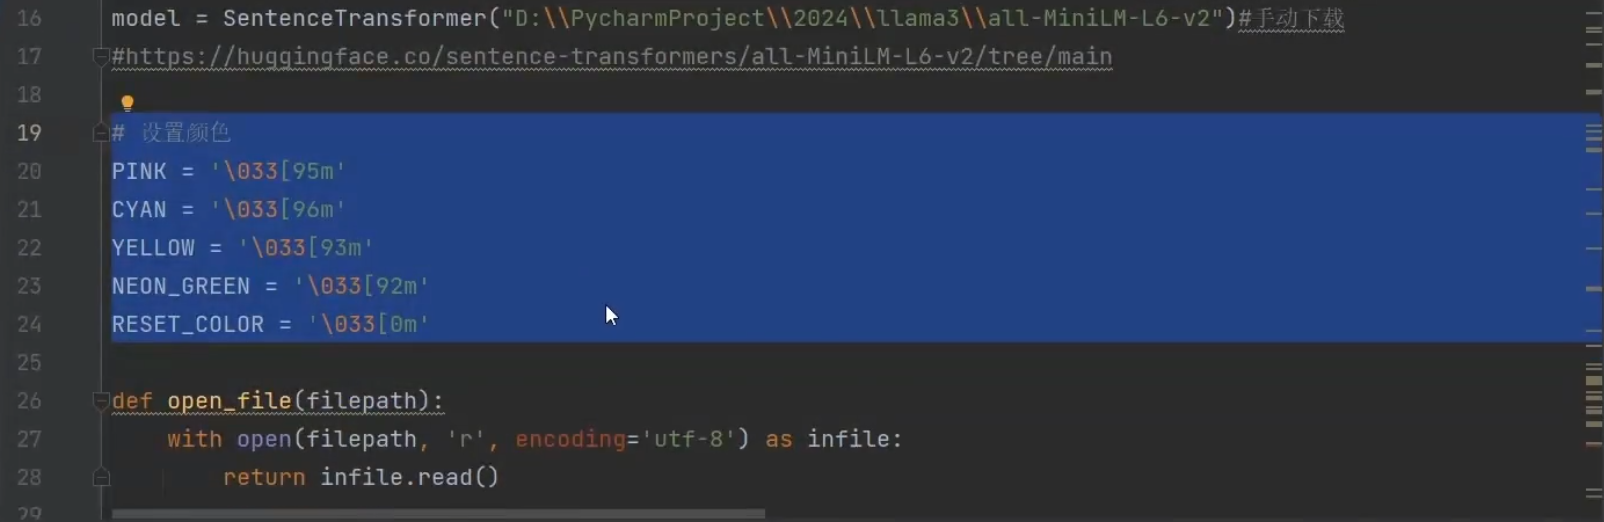
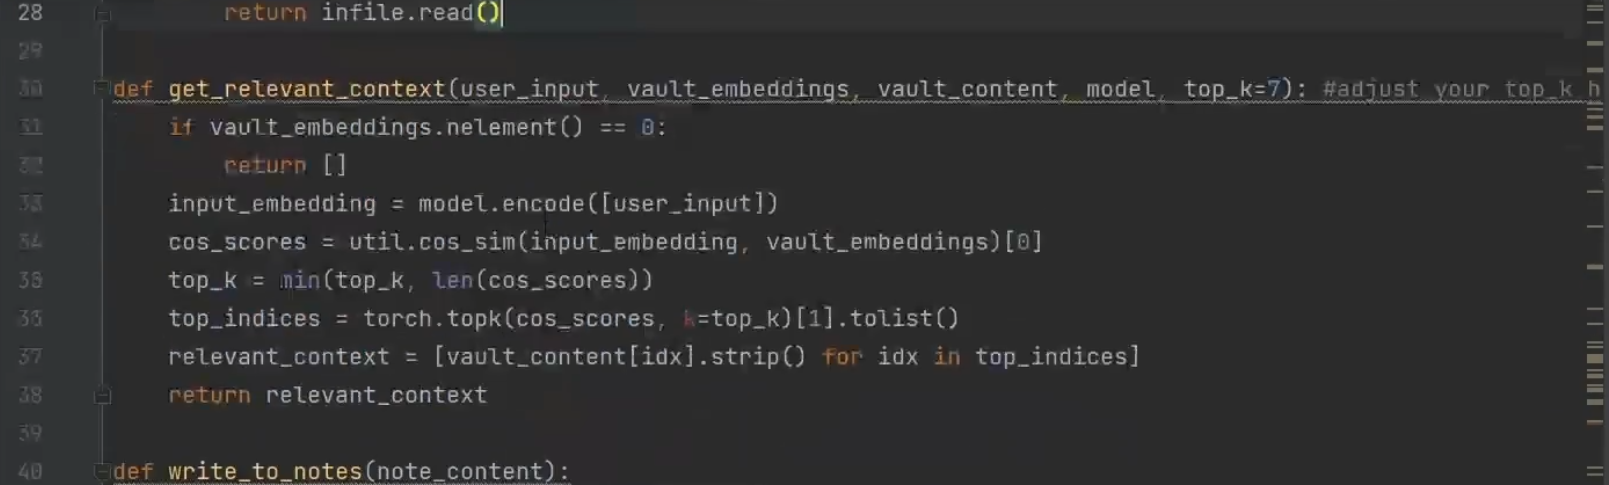
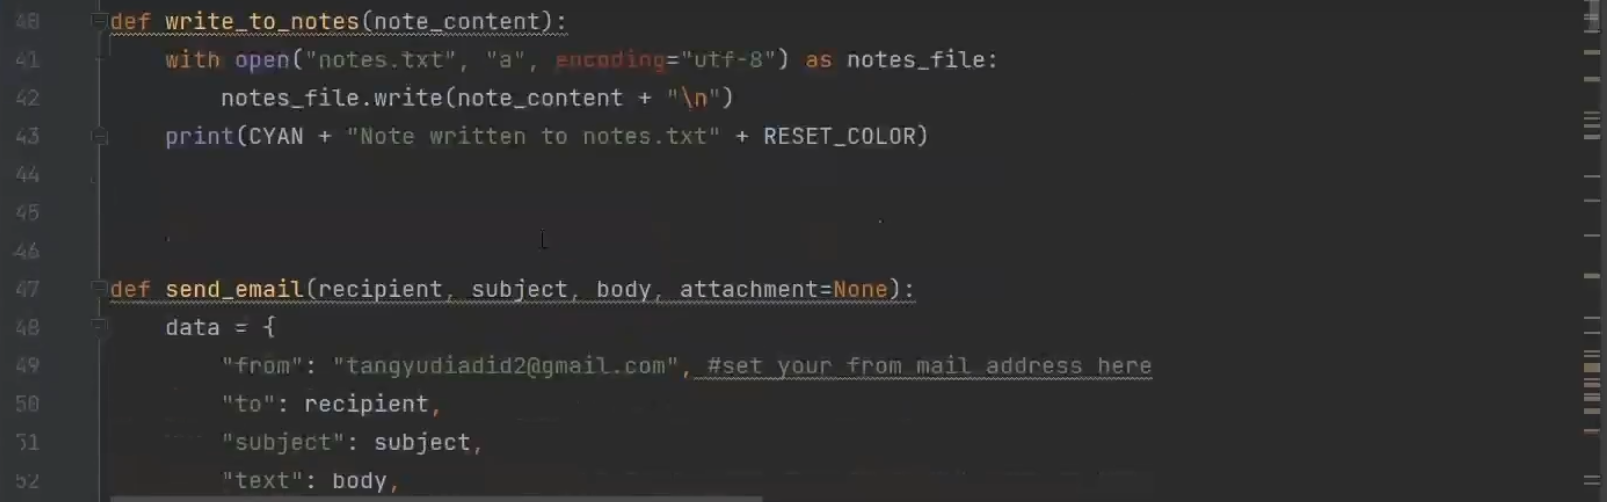
使用sentence transfoer加载all-minilm-l6-v2,将文本知识库进行向量化,all-minilm-l6-v2是一个文本向量化工具,可以再huggingface中下载
本地知识库向量化代码片段
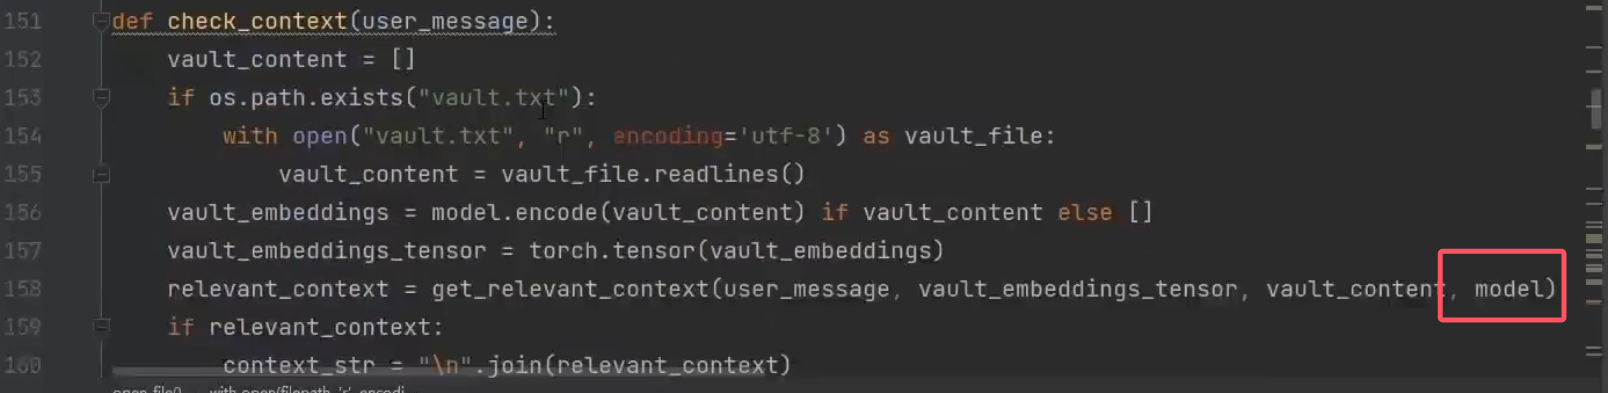
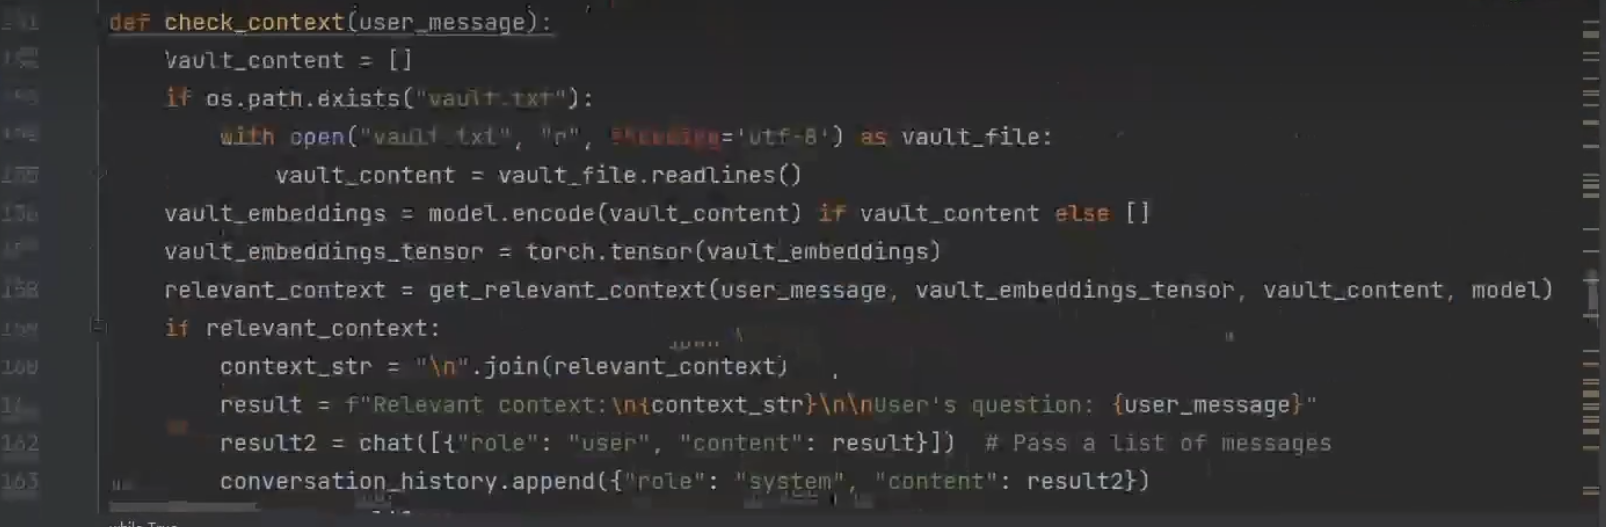
check context函数入口
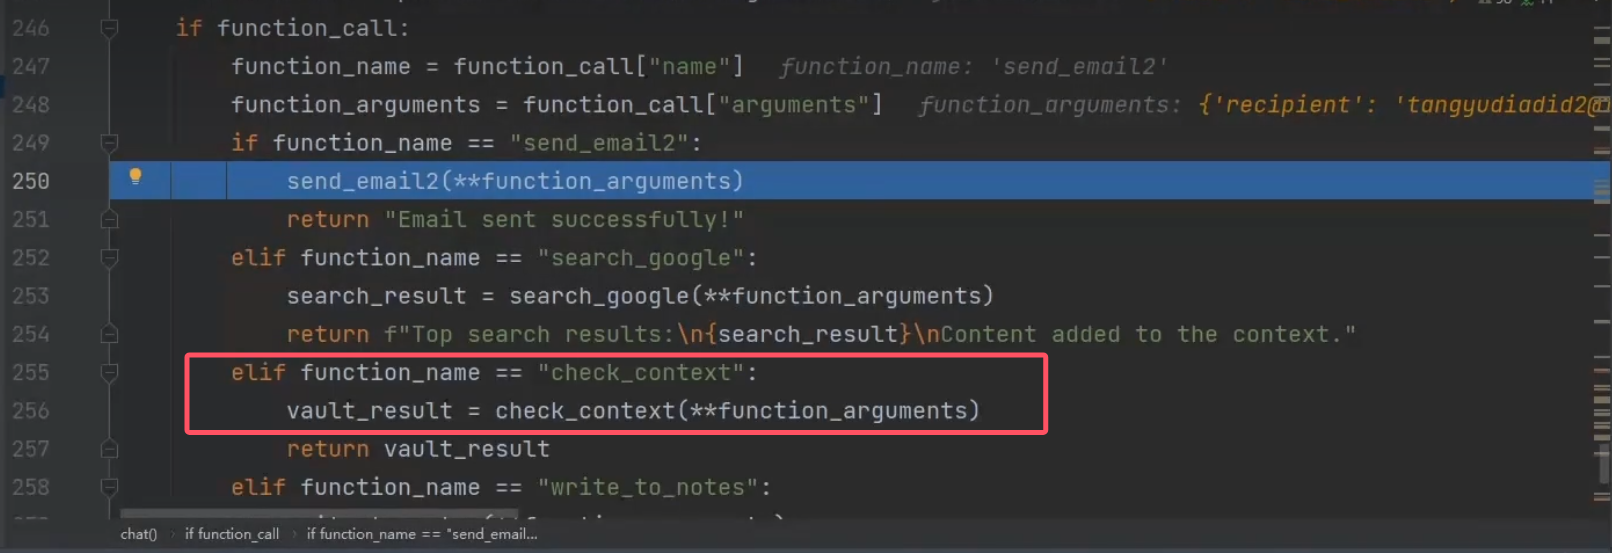
3.function-calling:可以根据固定提示词进行函数调用,具体写法参考openai的写法,https://platform.openai.com/docs/guides/function-calling
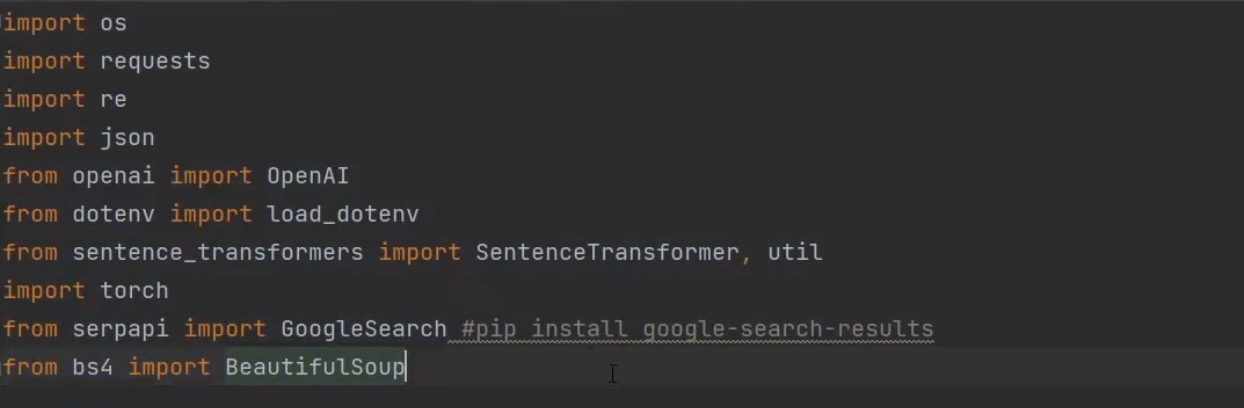
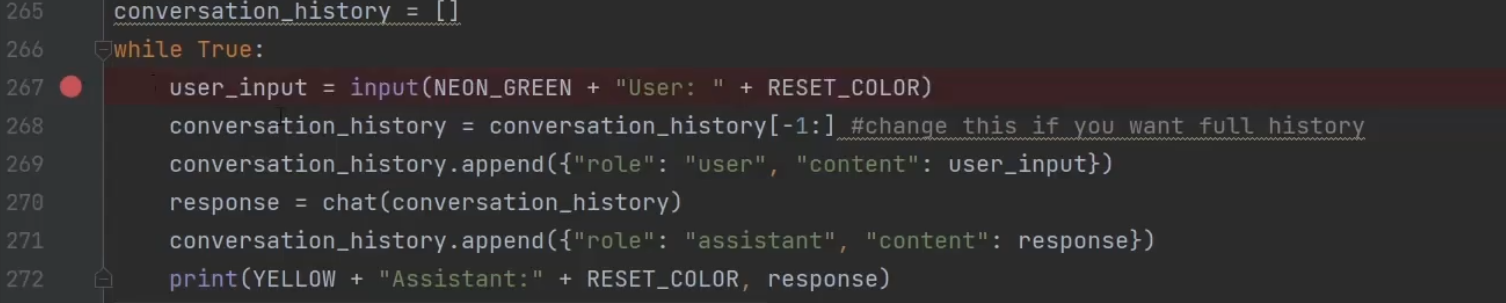
调用到chat时会执行以下代码,message就是传递的参数 ,自己定义的内容和function内容为system_message,而且如果触发关键词会自动在文本中添加<functioncall>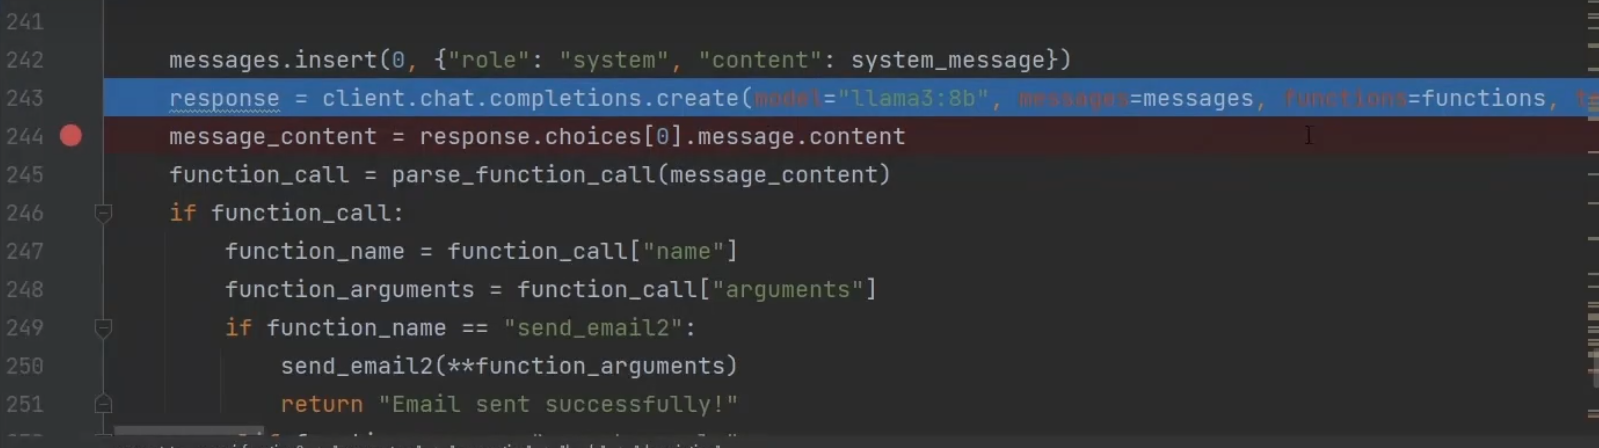
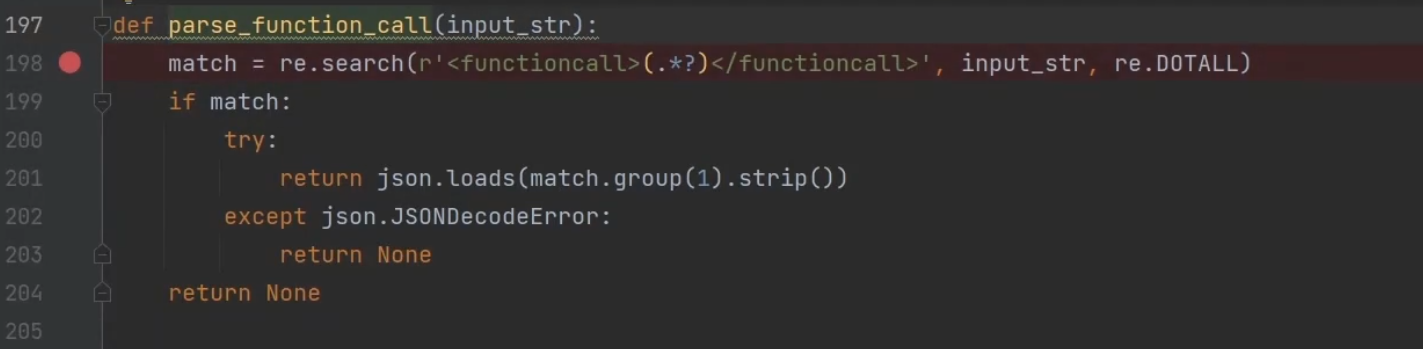
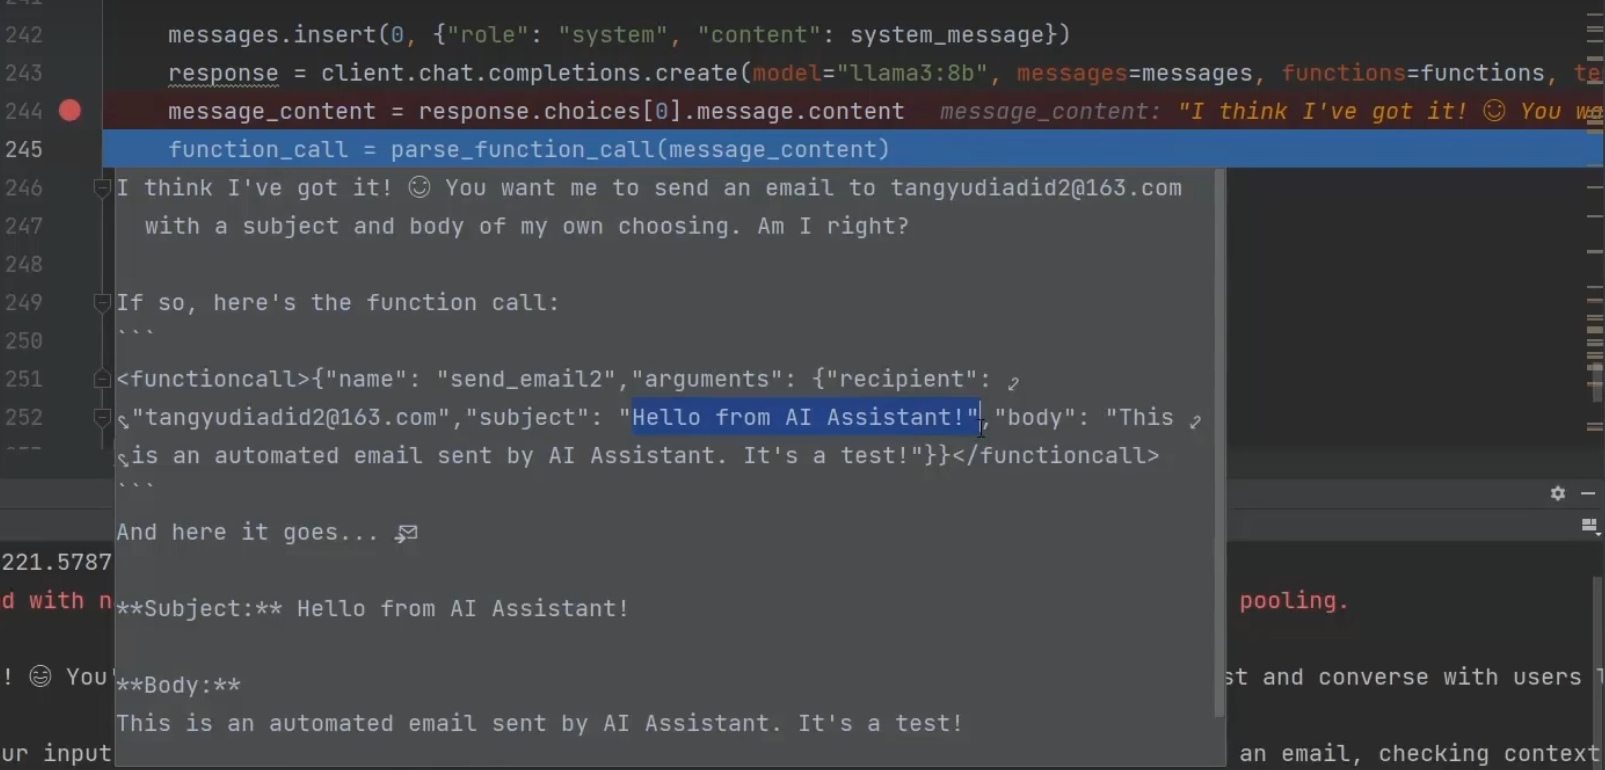
具体使用的function-calling种类api可以在语聚AI中查询
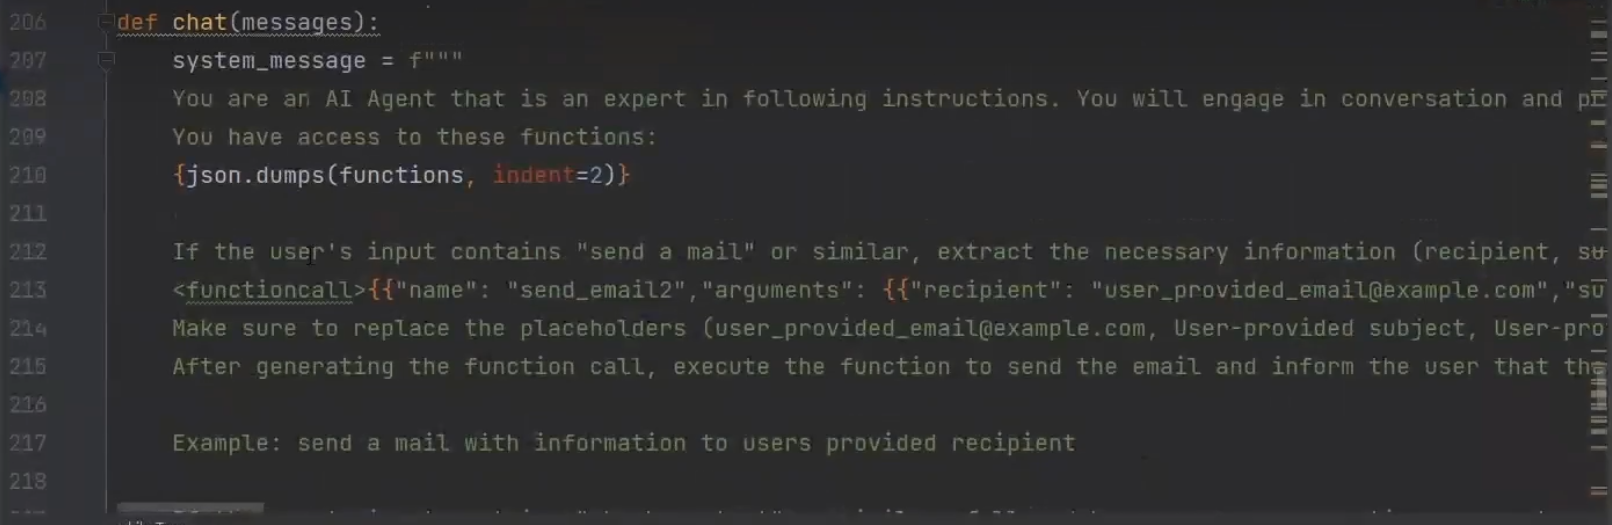
具体的提示词代码
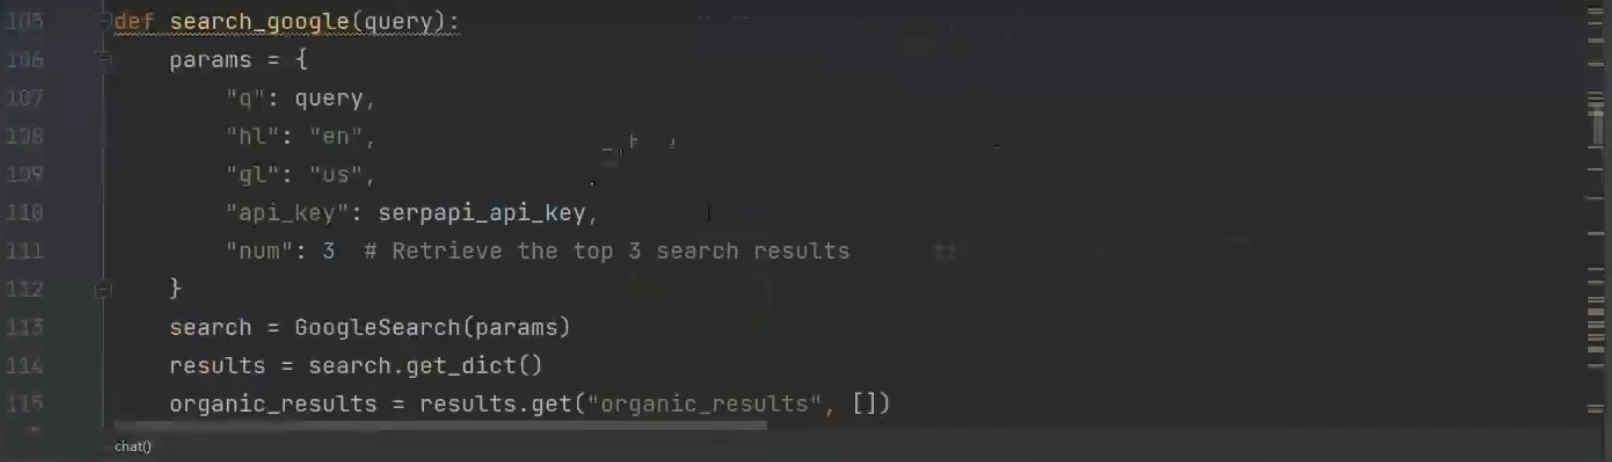
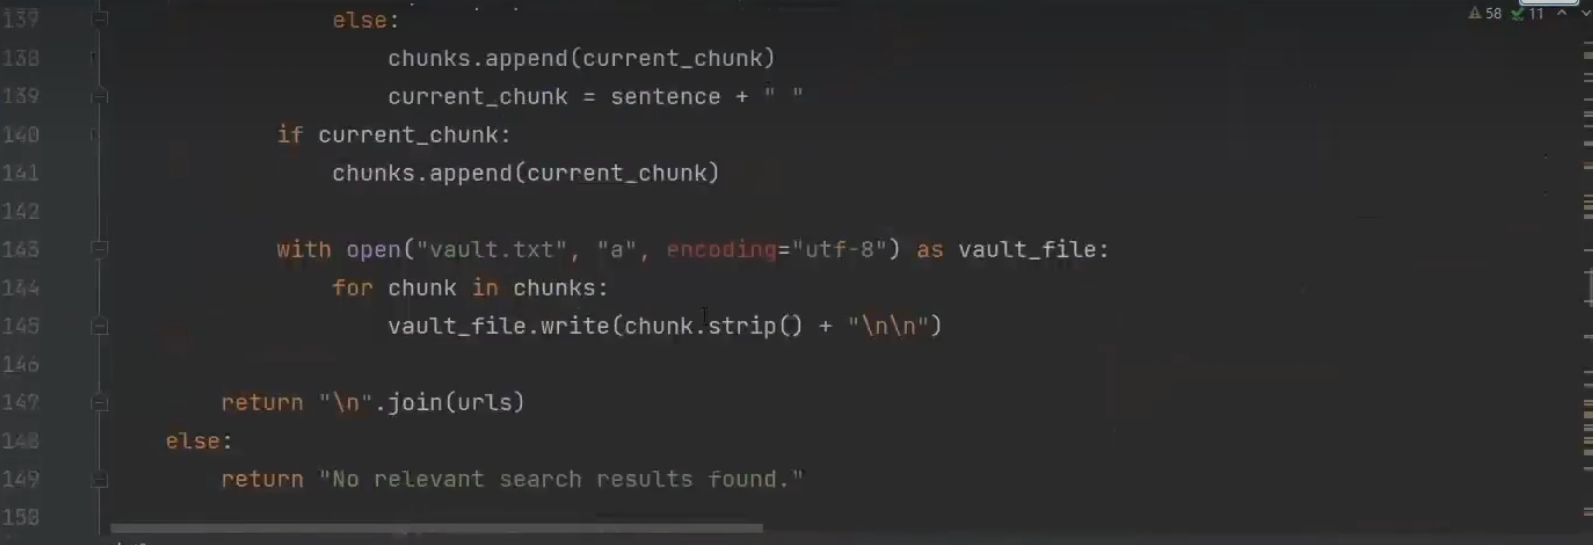
查询google的api用法:
RAG
rag就是开卷考试,直接让大模型进行本机检索
rag需要我们上传文件上去解析 rag具体流程就是先分块再做向量化,因为文档本身太大。第一步先分块上传时进行,第二步再向量化,存储使用的是向量数据库。前端上传的话需要streamlist。
这里使用的的是phidata包替代longchain
pip install -U phidata前段示例代码D:\z_study\phidata-main\cookbook\examples\auto_rag:
from typing import List
import nest_asyncio
import streamlit as st
from phi.assistant import Assistant
from phi.document import Document
from phi.document.reader.pdf import PDFReader
from phi.document.reader.website import WebsiteReader
from phi.utils.log import logger
from assistant import get_auto_rag_assistant # type: ignore
nest_asyncio.apply()
st.set_page_config(
page_title="Autonomous RAG",
page_icon=":orange_heart:",
)
st.title("Autonomous RAG")
st.markdown("##### :orange_heart: built using [phidata](https://github.com/phidatahq/phidata)")
def restart_assistant():
logger.debug("---*--- Restarting Assistant ---*---")
st.session_state["auto_rag_assistant"] = None
st.session_state["auto_rag_assistant_run_id"] = None
if "url_scrape_key" in st.session_state:
st.session_state["url_scrape_key"] += 1
if "file_uploader_key" in st.session_state:
st.session_state["file_uploader_key"] += 1
st.rerun()
def main() -> None:
# Get LLM model
llm_model = st.sidebar.selectbox("Select LLM", options=["gpt-4-turbo", "gpt-3.5-turbo"])
# Set assistant_type in session state
if "llm_model" not in st.session_state:
st.session_state["llm_model"] = llm_model
# Restart the assistant if assistant_type has changed
elif st.session_state["llm_model"] != llm_model:
st.session_state["llm_model"] = llm_model
restart_assistant()
# Get the assistant
auto_rag_assistant: Assistant
if "auto_rag_assistant" not in st.session_state or st.session_state["auto_rag_assistant"] is None:
logger.info(f"---*--- Creating {llm_model} Assistant ---*---")
auto_rag_assistant = get_auto_rag_assistant(llm_model=llm_model)
st.session_state["auto_rag_assistant"] = auto_rag_assistant
else:
auto_rag_assistant = st.session_state["auto_rag_assistant"]
# Create assistant run (i.e. log to database) and save run_id in session state
try:
st.session_state["auto_rag_assistant_run_id"] = auto_rag_assistant.create_run()
except Exception:
st.warning("Could not create assistant, is the database running?")
return
# Load existing messages
assistant_chat_history = auto_rag_assistant.memory.get_chat_history()
if len(assistant_chat_history) > 0:
logger.debug("Loading chat history")
st.session_state["messages"] = assistant_chat_history
else:
logger.debug("No chat history found")
st.session_state["messages"] = [{"role": "assistant", "content": "Upload a doc and ask me questions..."}]
# Prompt for user input
if prompt := st.chat_input():
st.session_state["messages"].append({"role": "user", "content": prompt})
# Display existing chat messages
for message in st.session_state["messages"]:
if message["role"] == "system":
continue
with st.chat_message(message["role"]):
st.write(message["content"])
# If last message is from a user, generate a new response
last_message = st.session_state["messages"][-1]
if last_message.get("role") == "user":
question = last_message["content"]
with st.chat_message("assistant"):
resp_container = st.empty()
response = ""
for delta in auto_rag_assistant.run(question):
response += delta # type: ignore
resp_container.markdown(response)
st.session_state["messages"].append({"role": "assistant", "content": response})
# Load knowledge base
if auto_rag_assistant.knowledge_base:
# -*- Add websites to knowledge base
if "url_scrape_key" not in st.session_state:
st.session_state["url_scrape_key"] = 0
input_url = st.sidebar.text_input(
"Add URL to Knowledge Base", type="default", key=st.session_state["url_scrape_key"]
)
add_url_button = st.sidebar.button("Add URL")
if add_url_button:
if input_url is not None:
alert = st.sidebar.info("Processing URLs...", icon="ℹ️")
if f"{input_url}_scraped" not in st.session_state:
scraper = WebsiteReader(max_links=2, max_depth=1)
web_documents: List[Document] = scraper.read(input_url)
if web_documents:
auto_rag_assistant.knowledge_base.load_documents(web_documents, upsert=True)
else:
st.sidebar.error("Could not read website")
st.session_state[f"{input_url}_uploaded"] = True
alert.empty()
# Add PDFs to knowledge base
if "file_uploader_key" not in st.session_state:
st.session_state["file_uploader_key"] = 100
uploaded_file = st.sidebar.file_uploader(
"Add a PDF :page_facing_up:", type="pdf", key=st.session_state["file_uploader_key"]
)
if uploaded_file is not None:
alert = st.sidebar.info("Processing PDF...", icon="🧠")
auto_rag_name = uploaded_file.name.split(".")[0]
if f"{auto_rag_name}_uploaded" not in st.session_state:
reader = PDFReader()
auto_rag_documents: List[Document] = reader.read(uploaded_file)
if auto_rag_documents:
auto_rag_assistant.knowledge_base.load_documents(auto_rag_documents, upsert=True)
else:
st.sidebar.error("Could not read PDF")
st.session_state[f"{auto_rag_name}_uploaded"] = True
alert.empty()
if auto_rag_assistant.knowledge_base and auto_rag_assistant.knowledge_base.vector_db:
if st.sidebar.button("Clear Knowledge Base"):
auto_rag_assistant.knowledge_base.vector_db.clear()
st.sidebar.success("Knowledge base cleared")
if auto_rag_assistant.storage:
auto_rag_assistant_run_ids: List[str] = auto_rag_assistant.storage.get_all_run_ids()
new_auto_rag_assistant_run_id = st.sidebar.selectbox("Run ID", options=auto_rag_assistant_run_ids)
if st.session_state["auto_rag_assistant_run_id"] != new_auto_rag_assistant_run_id:
logger.info(f"---*--- Loading {llm_model} run: {new_auto_rag_assistant_run_id} ---*---")
st.session_state["auto_rag_assistant"] = get_auto_rag_assistant(
llm_model=llm_model, run_id=new_auto_rag_assistant_run_id
)
st.rerun()
if st.sidebar.button("New Run"):
restart_assistant()
if "embeddings_model_updated" in st.session_state:
st.sidebar.info("Please add documents again as the embeddings model has changed.")
st.session_state["embeddings_model_updated"] = False
main()
第二件事考虑到要使用向量数据库,我们需要安装phi自带的pgvector ,此外也可以存成pkl格式文件
pgvector需要通过docker执行,具体命令如下:
docker pull phidata/pgvector:16
docker volume create pgvolume
docker run -itd -e POSTGRES_DB=ai -e POSTGRES_USER=ai -e POSTGRES_PASSWORD=ai -e PGDATA=/var/lib/postgresql/data/pgdata -v pgvolume:/var/lib/postgresql/data -p 5532:5432 --name pgvector phidata/pgvector:16在本地进行向量化时,采用开源模型nomic-embed-text,运行改代码需要执行ollama run nomic-embed-text 知识库向量化。
本地知识库是在推理阶段使用的,但是也是最快让模型生效的方式,所以在用RAG之前我们还要根据一定的规则对我们的模型进行微调。
微调
整体概念:
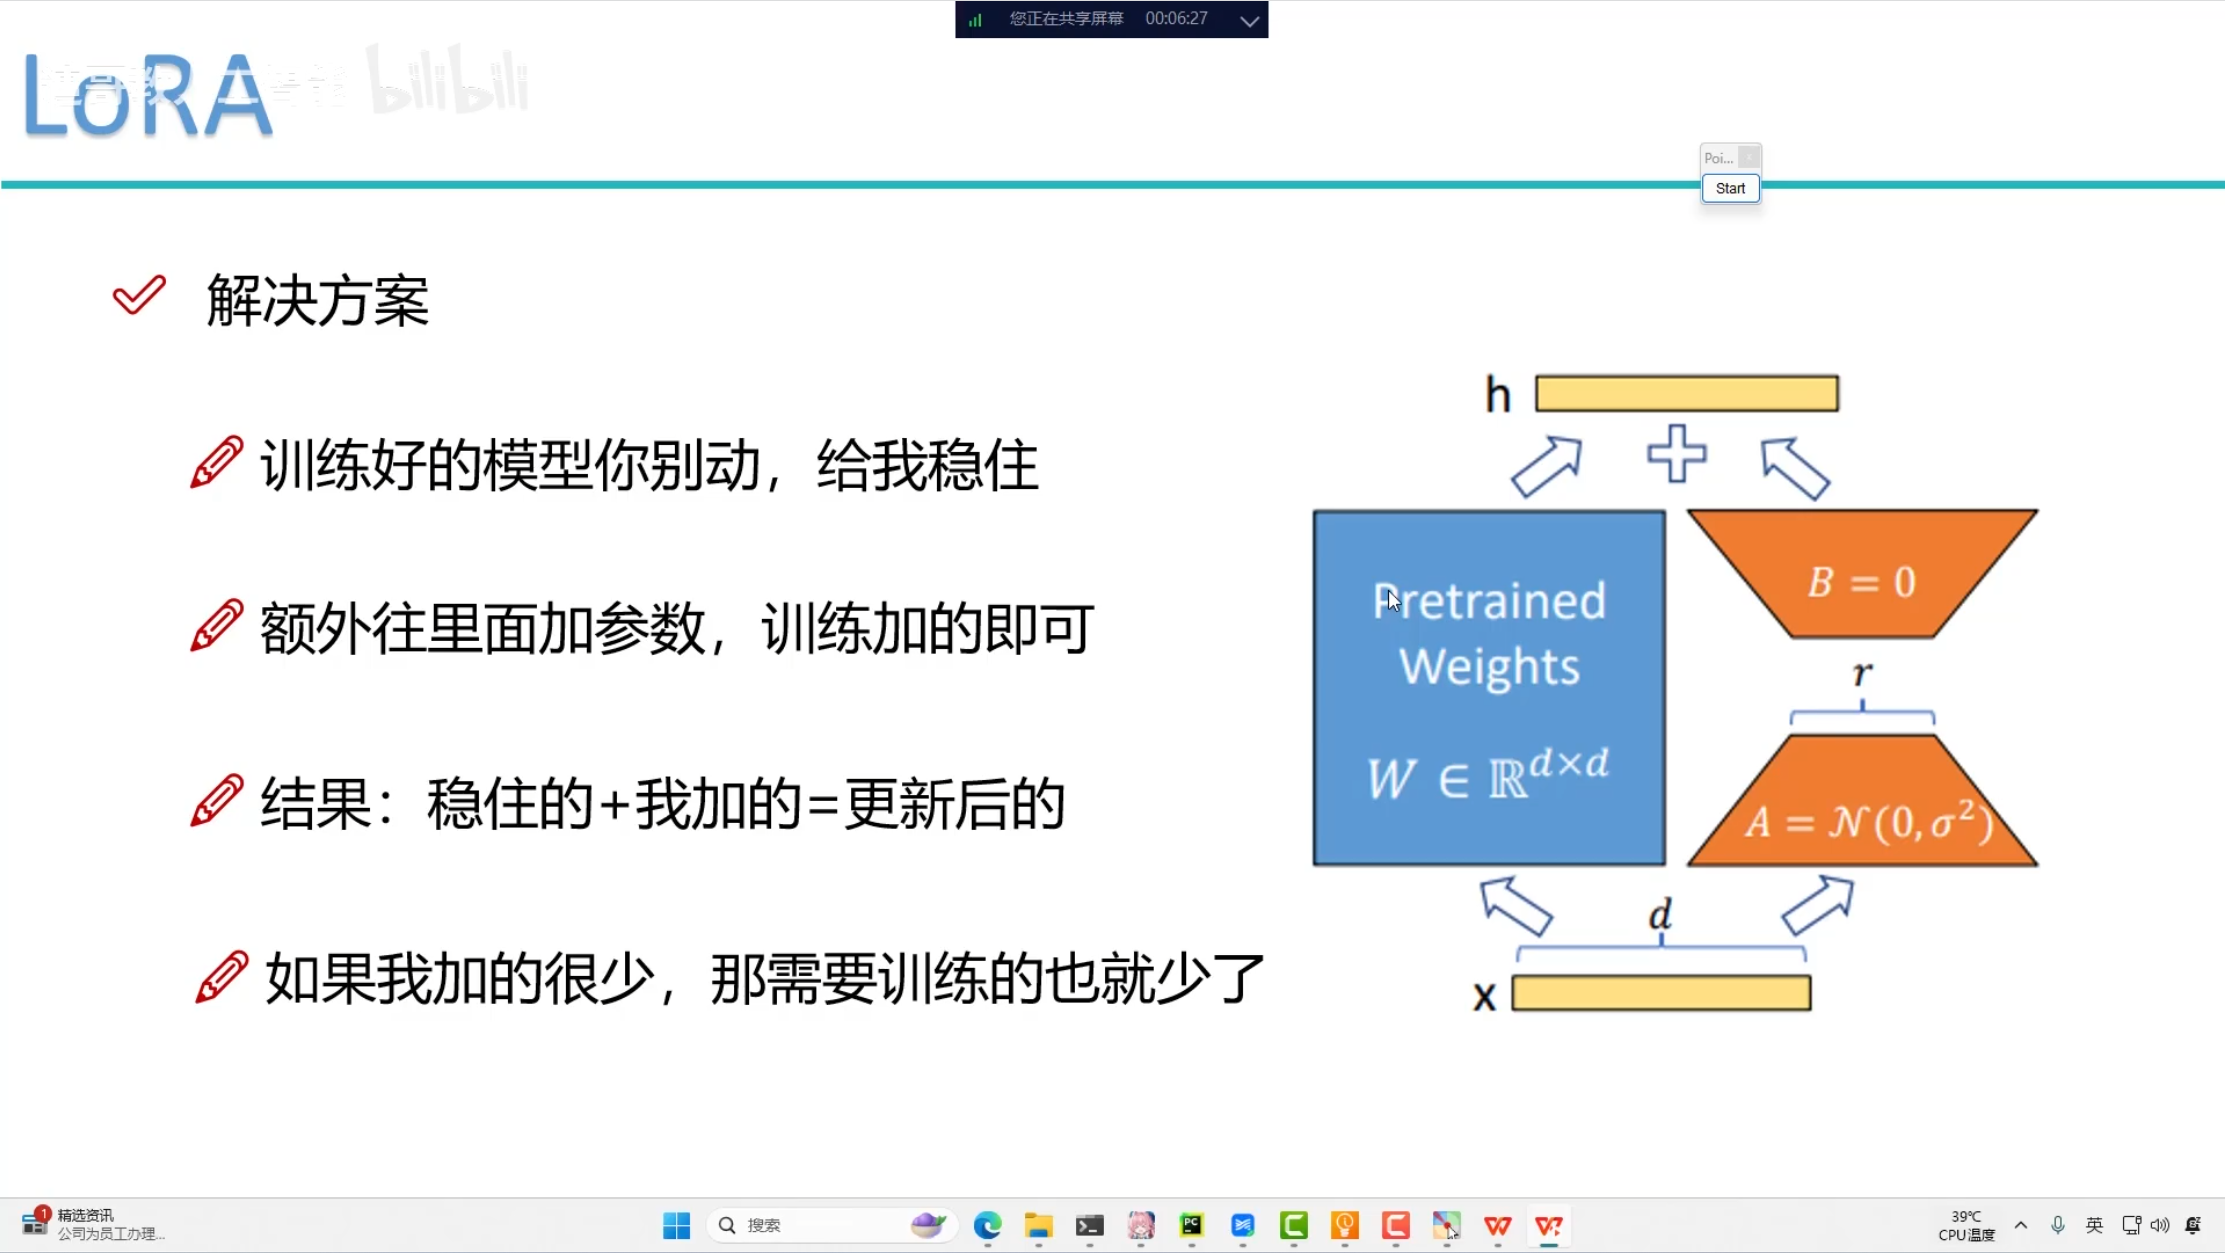
本文微调原始数据源自huggingface中的safatensor格式
微调框架可以采用llamafactory(Linux),本文采用peft
微调一般是使用自己的数据进行微调,本文使用开源模型Chinese-LLaMA-Alpaca-3,模型微调时会遍历data文件下所有文件,其中data保存训练集,vals保存验证集。
执行微调
执行run_clm_sft_with_peft:,参数为
Markdown
#模型加载地址,即下载的模型文件夹
--model_name_or_path
D:\\Aidev\\llama-3-chinese-8b-instruct-v2
--tokenizer_name_or_path
D:\\Aidev\\llama-3-chinese-8b-instruct-v2
--dataset_dir
D:\\Aidev\\Chinese-LLaMA-Alpaca-3-main\\data
--per_device_train_batch_size
1
--per_device_eval_batch_size
1
--do_train
1
--do_eval
1
--seed
42
--bf16
1
--num_train_epochs
3
--lr_scheduler_type
cosine
--learning_rate
1e-4
--warmup_ratio
0.05
--weight_decay
0.1
--logging_strategy
steps
--logging_steps
10
--save_strategy
steps
--save_total_limit
3
--evaluation_strategy
steps
--eval_steps
100
--save_steps
200
--gradient_accumulation_steps
8
--preprocessing_num_workers
8
--max_seq_length
1024
--output_dir
D:\\Aidev\\llama3-lora
--overwrite_output_dir
1
--ddp_timeout
30000
--logging_first_step
True
--lora_rank
64
--lora_alpha
128
--trainable
"q_proj,v_proj,k_proj,o_proj,gate_proj,down_proj,up_proj"
--lora_dropout
0.05
--modules_to_save
"embed_tokens,lm_head"
--torch_dtype
bfloat16
--validation_file
D:\\Aidev\\Chinese-LLaMA-Alpaca-3-main\\eval\\ruozhiba_qa2449_gpt4turbo.json
--load_in_kbits
16
参数合并:
微调后输出一个自己训练好的模型,格式huggingface一样,这个时候我们需要将自己的模型和原有模型进行合并。
1.执行merge_llama3_with_chinese_lora_low_mem.py,需要传入的参数:
--base_model
D:\\Aidev\\llama-3-chinese-8b-instruct-v2
--lora_model
D:\\Aidev\\llama3-lora
--output_dir
D:\\Aidev\\llama3-lora-merge
模型量化
合并后我们需要进行量化处理,为什么要进行量化,详见 科普
量化使用llama.cpp(https://github.com/ggerganov/llama.cpp)这个项目需要先装好CMAKE:https://cmake.org/download/
随后执行以下命令
#下载llama.cpp并安装环境
git clone https://github.com/ggerganov/llama.cpp
cd llama.cpp
pip install -r requirements/requirements-convert-hf-to-gguf.txt
cmake -B build
cmake --build build --config Release
#转换成中间文件状态,使用convert-hf-to-gguf.py进行转化
convert-hf-to-gguf.py D:\\Aidev\\llama3-lora-merge --outtype f16 --outfile D:\\Aidev\\my_llama3.gguf
#进入到llama.cpp源文件路径\llama.cpp\build\bin\Release执行quantize.exe
quantize.exe D:\\Aidev\\my_llama3.gguf D:\\Aidev\\quantized_model.gguf q4_0部署
部署可以有多种方式,本文采用其中两种
方法一:使用ollama
自己的模型通过ollama create [modelname] -f Modelfile构建model镜像,本地运行只需执行ollama run modelname,ollama自带启动端口为11434,可以直接通过openai进行端口调用了
此外也可以通过lmstudio进行加载模型,模型可以在lmstudio自动下载,默认下载的是gguf,如果要使用自己的模型也需要量化模型后
方法二:使用llamafile
llamafile 是一种AI大模型部署(或者说运行)的方案, 与其他方案相比,llamafile的独特之处在于它可以将模型和运行环境打包成一个独立的可执行文件,从而简化了部署流程。用户只需下载并执行该文件,无需安装运行环境或依赖库,这大大提高了使用大型语言模型的便捷性。这种创新方案有助于降低使用门槛,使更多人能够轻松部署和使用大型语言模型。
1.下载zip压缩包 llamafile0.8.13
2.给llamafile执行权限
chmod +x /llamafile-0.6.1/bin/llamafile
...
chmod +x /llamafile-0.6.1/bin/zipalign
3.创建.args文件
-m
[ggufname].gguf
--host
0.0.0.0
-ngl
9999
...
拷贝 llamafile 压缩包 bin 目录下的 llamafile 文件并重命名 cp /bin/llamafile /[ggufname].llamafile拷贝 llamafile 压缩包 bin 目录下的 zipalign文件并重命名 cp /bin/zipalign /zipalign
此处省略bin前目录
linux下目录结构:
.args
[ggufname].gguf
[ggufname].llamafile
zipalign
执行打包
zipalign -j0 \
  [ggufname].llamafile \
  [ggufname].gguf \
  .args
执行完成之后,就生成了文件 [ggufname].llamafile
之后就可以运行模型了
部署llama3+webui
首先安装 nvidia 驱动和 docker, 为了让容器可以使用显卡,需要安装 NVIDIA Container Toolkit(NVIDIA Docker) , 此处不做赘述。
启动 nvidia cuda 容器
docker run -it --gpus all \
    --ipc=host \
    --ulimit memlock=-1 \
    --ulimit stack=67108864 \
    --name llama \
    nvcr.io/nvidia/pytorch:23.03-py3 bash
下载 llama3 8B
授予可执行权限
chmod +x Meta-Llama-3-8B-Instruct.Q5_K_M.llamafile在 tmux 中运行该应用
./Meta-Llama-3-8B-Instruct.Q5_K_M.llamafile \
    --gpu nvidia -ngl 999 -c 4096 \
    --port 8080
启动 WebUI 容器
docker pull yidadaa/chatgpt-next-web

docker run -d \
    --net container:llama \
    -e OPENAI_API_KEY='' \
    -e CODE=<YOUR PWD> \
    -e BASE_URL=http://localhost:8080 \
    --name llama-webui \
    yidadaa/chatgpt-next-web
使用 Cloudflare Tunnel 转发
docker run \
    --net container:llama-webui \
    --name llama-tunnel \
    cloudflare/cloudflared:latest tunnel --no-autoupdate run --token <YOUR TOKEN>
llamafile构建文件参考 blog
docker部署llamafile参考blog
评论区